|
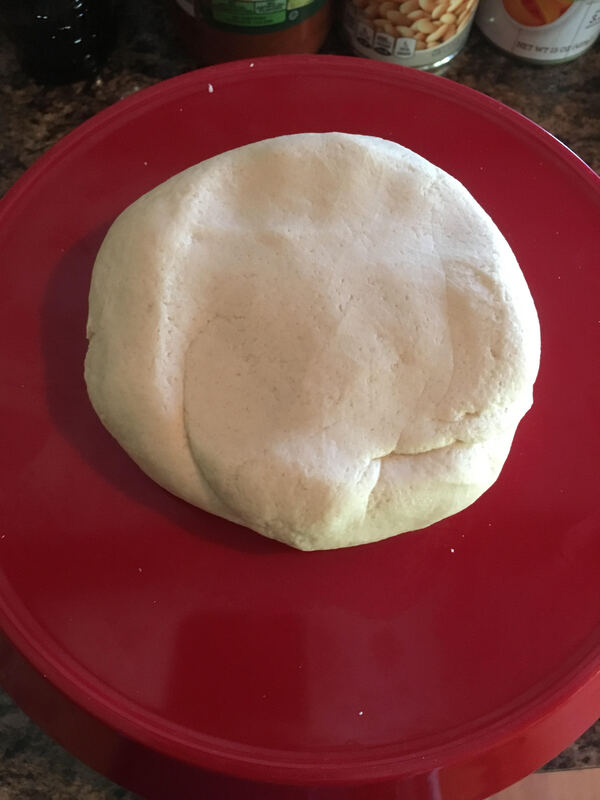
Happy Teacher Appreciation week! Throughout this pandemic, you parents have had to step in and become educators for your children, and I want to say how much I appreciate YOU for keeping your students in touch with Art Education, along with other core subjects. So, here's another integration project that will use art, math, and science! Some of you have acrylic paint and brushes at home, but some students are not as fortunate to have access to these materials. So, this week is all about using things you already have to create awesome art! For those of you who have acrylic paint at home, you'll only need to follow the first half of this post. For those of you who don't have paint at home, I'm adding in an additional portion on how to MAKE PAINT FROM ITEMS YOU MAY ALREADY HAVE IN YOUR KITCHEN CABINETS! So, without further ado, behold, the potato print!!!!
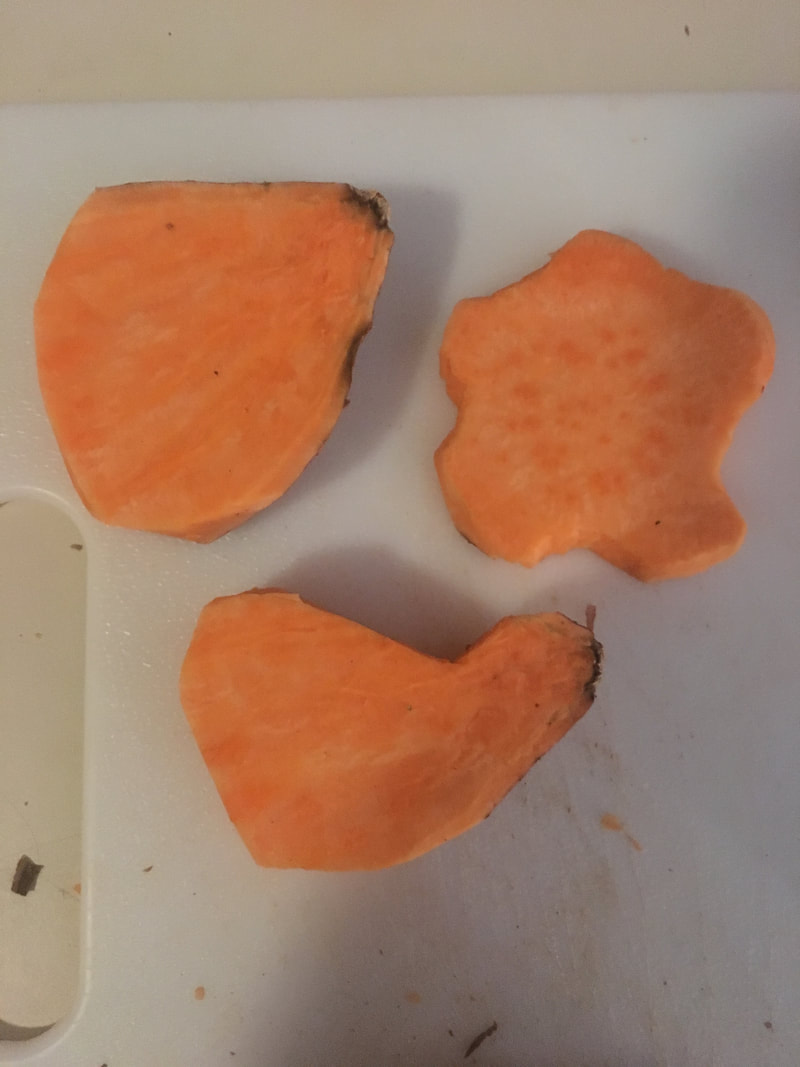
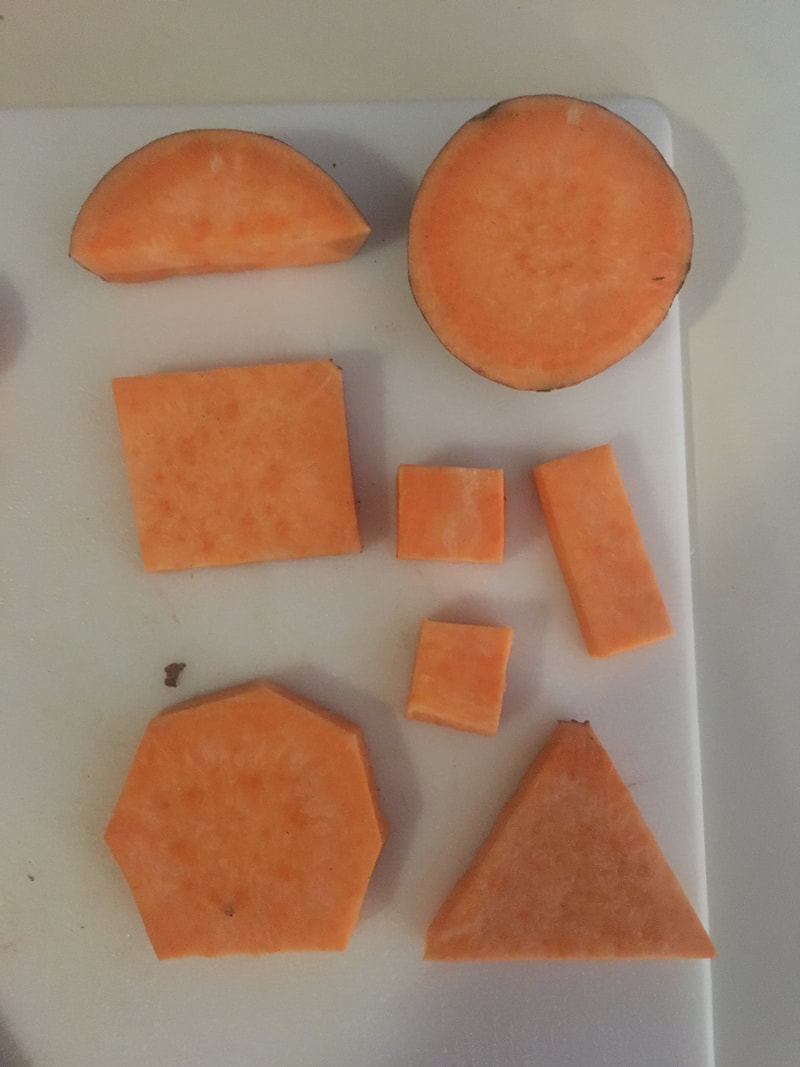
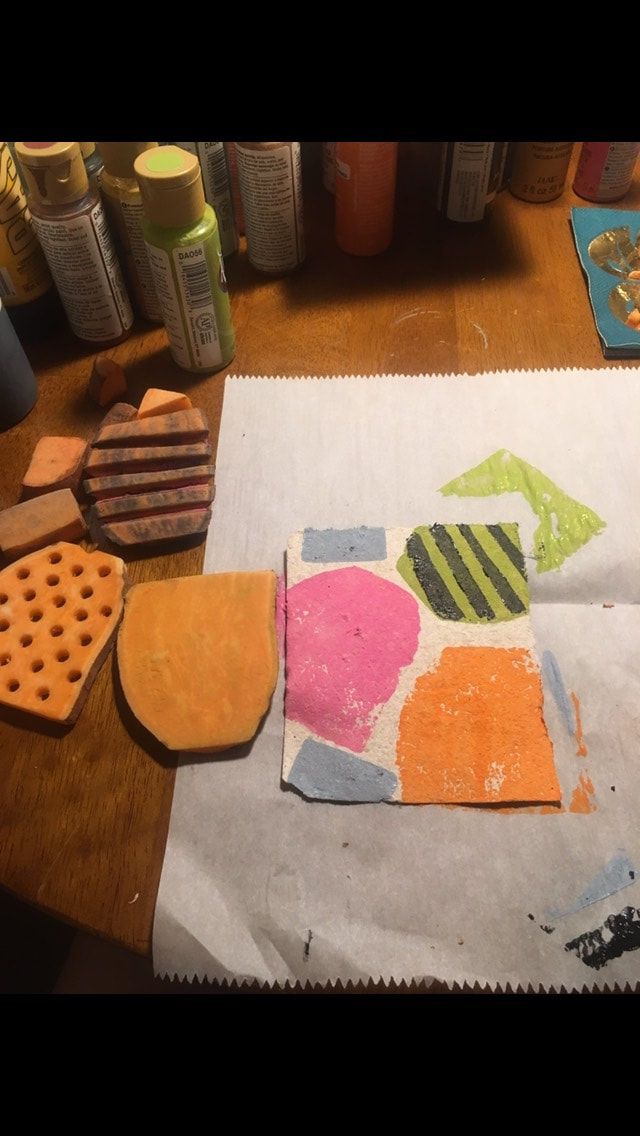
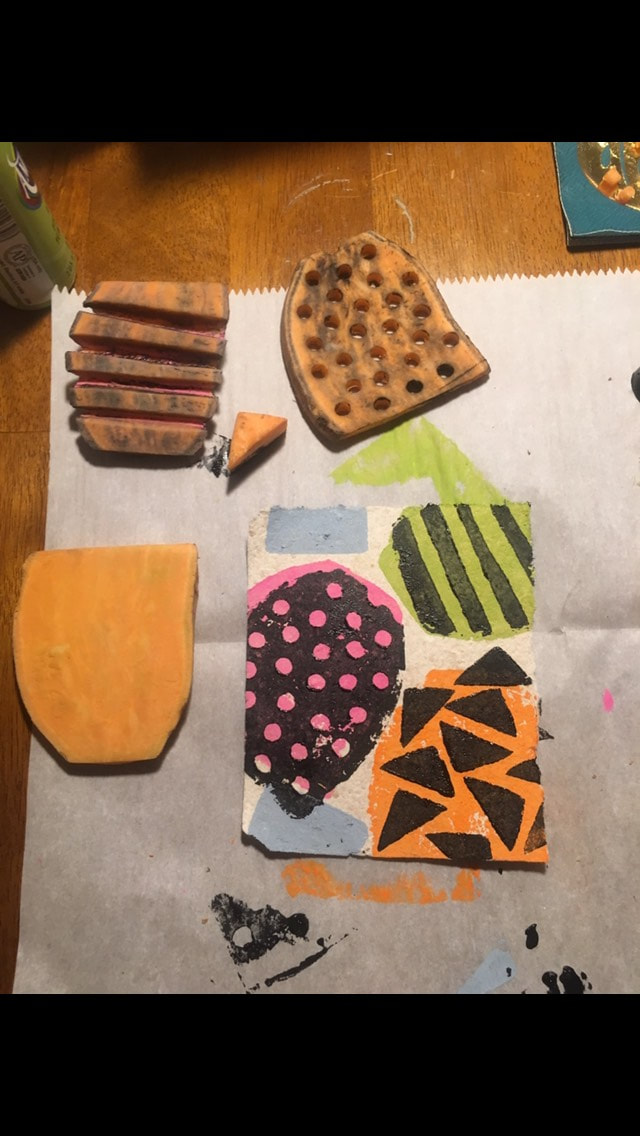
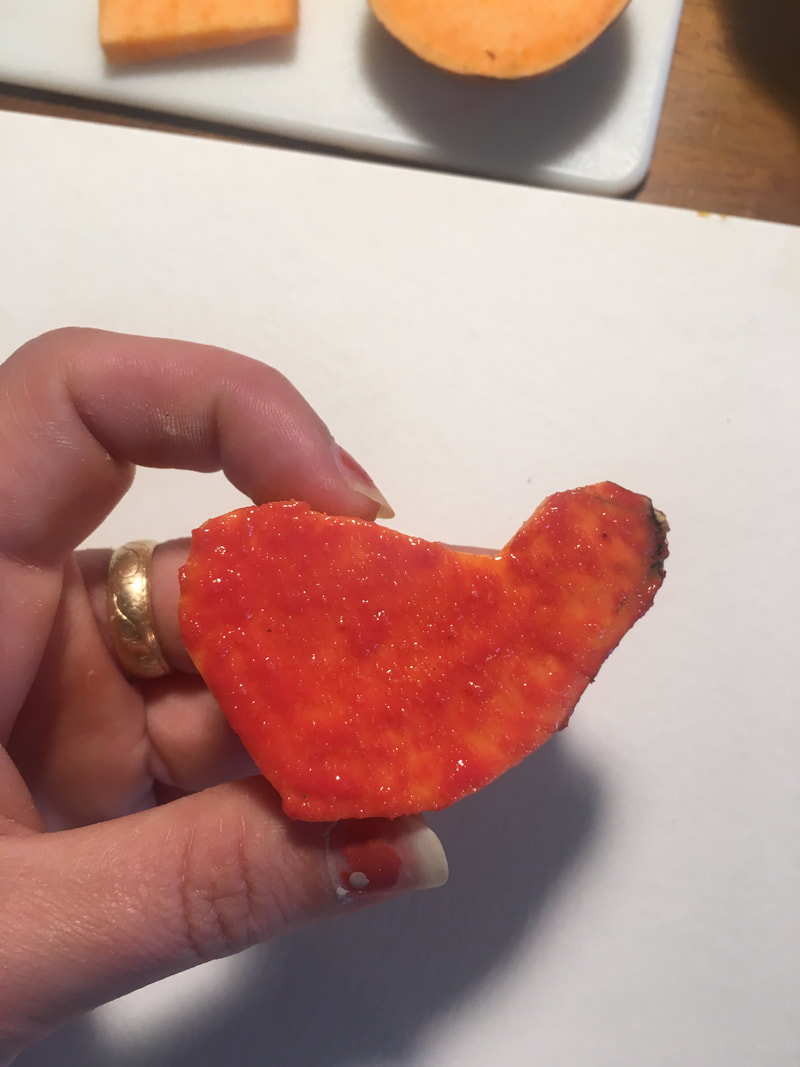
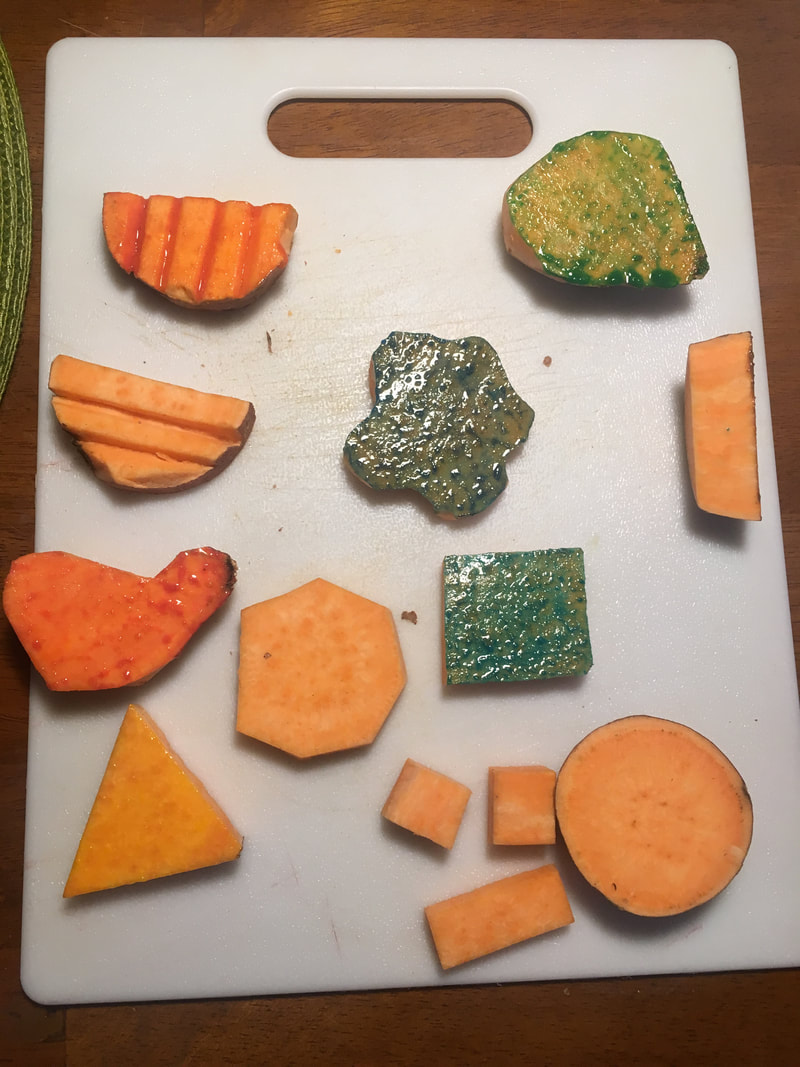
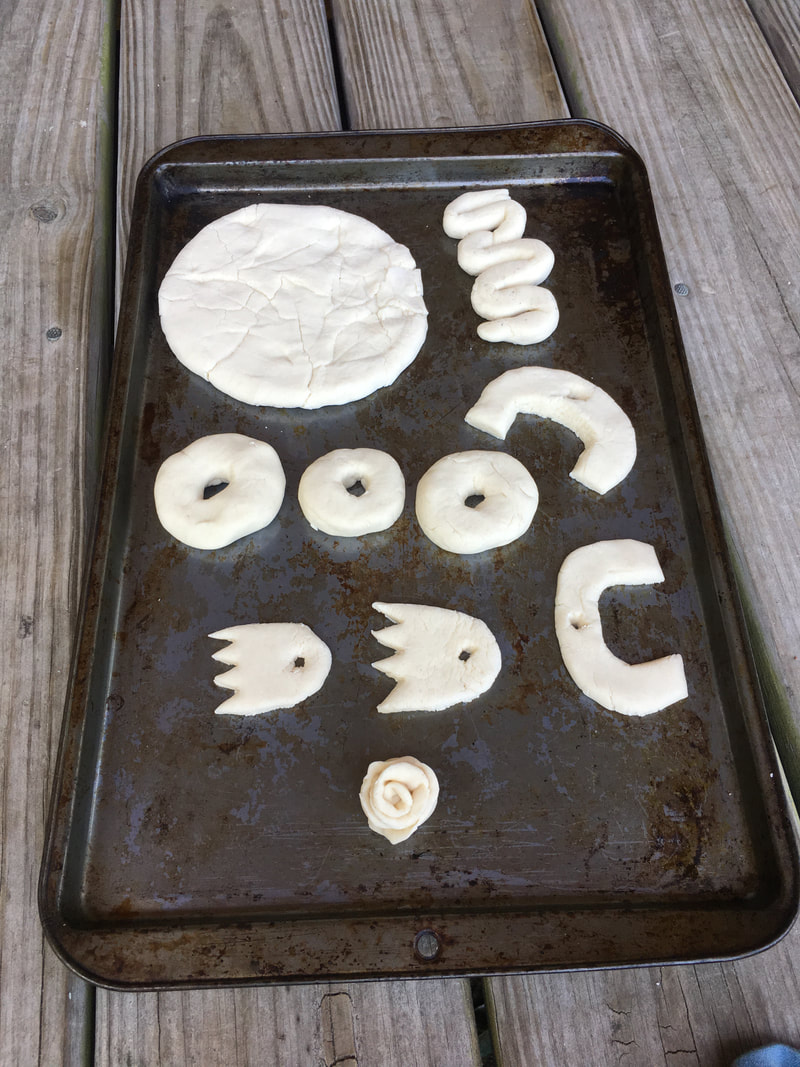
To create a potato print, you can use ANY kind of potato. For mine, I used a sweet potato! This project DOES require adult supervision. The first step is to use a knife to cut shapes from your potato. I have included examples of shapes that I cut, below. There are many different shapes, but all shapes are categorized into 2 types; Organic shapes (shapes that look natural) and Geometric shapes (man made, proportional).
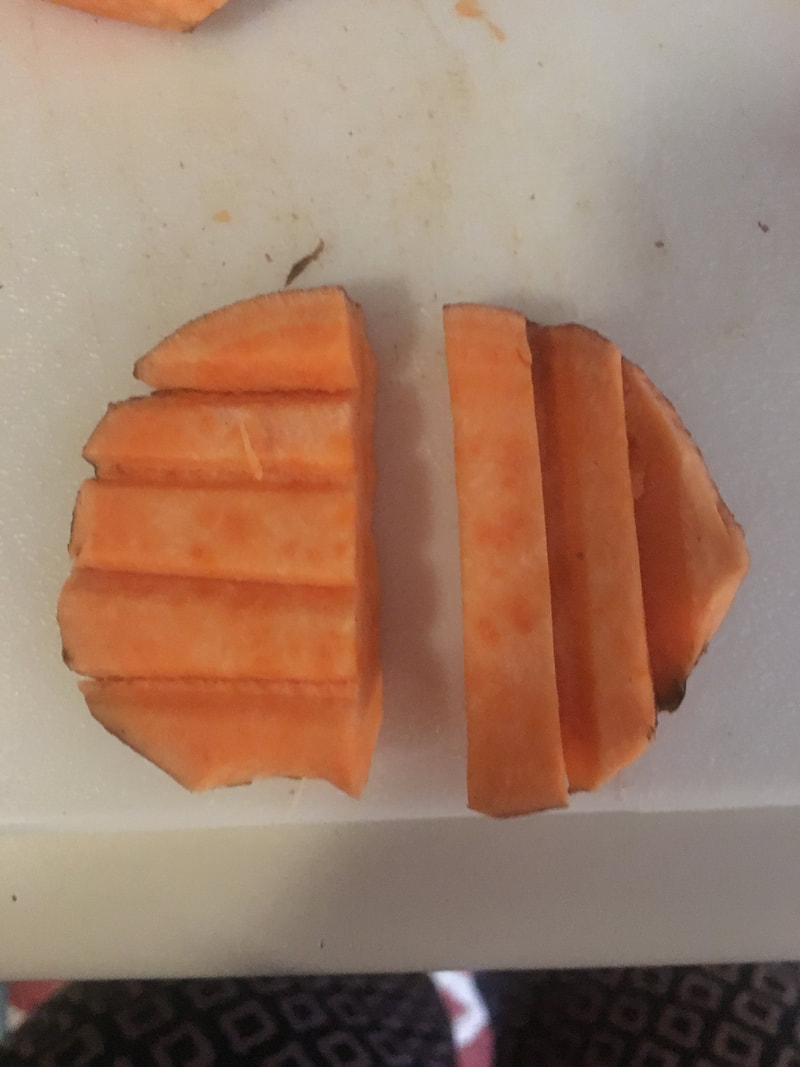
As well as creating flat shapes, you can cut into the surface of the potato to create patterns.
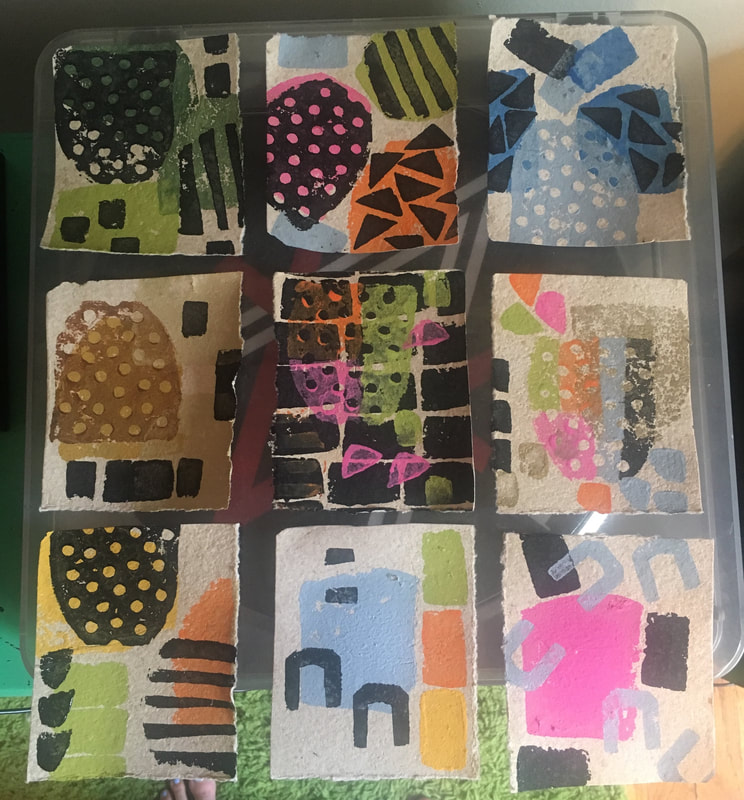
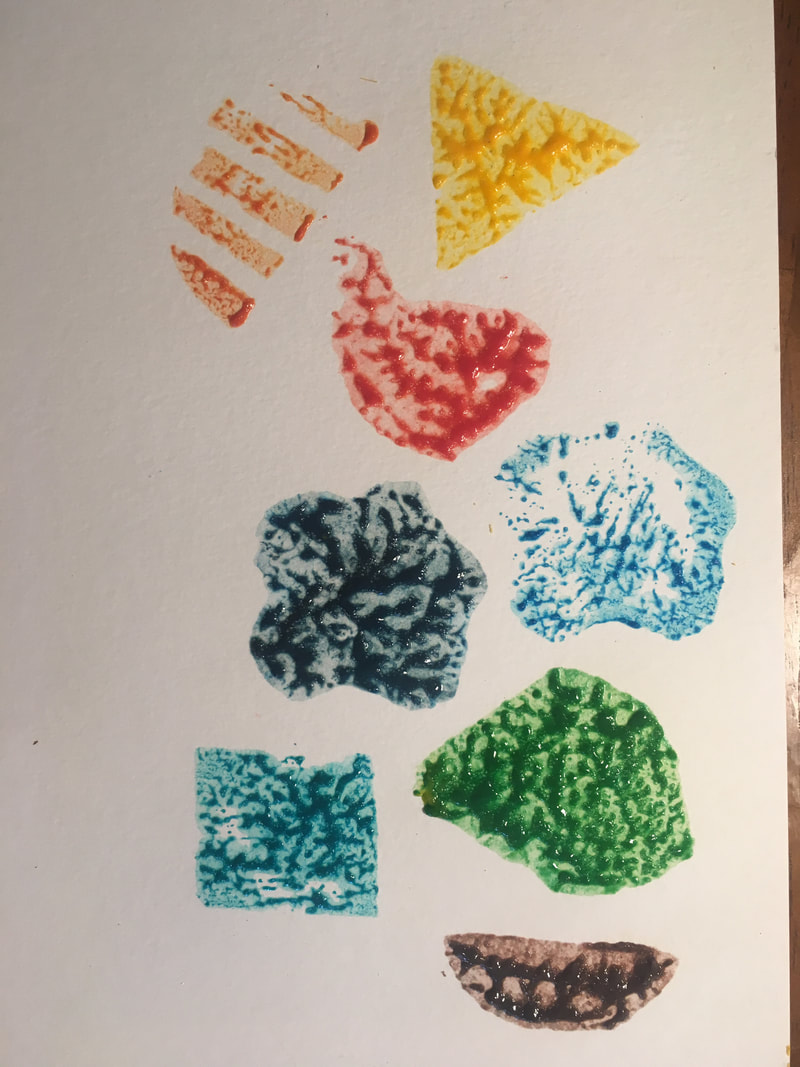
Once you've cut out your shapes, use a paintbrush to apply paint to the surface of the potato pieces. Press firmly onto a piece of paper, and then lift up your potato piece! It should leave behind paint in the shape of your potato. Try layering pieces and colors after each layer dries!
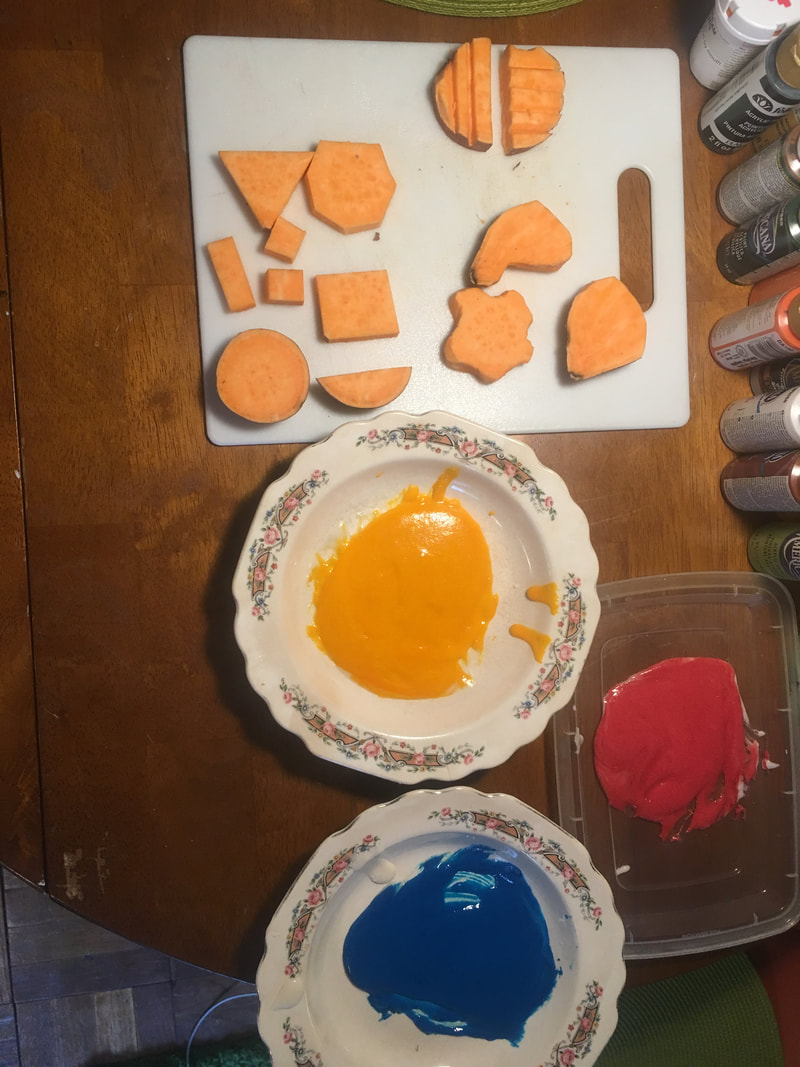
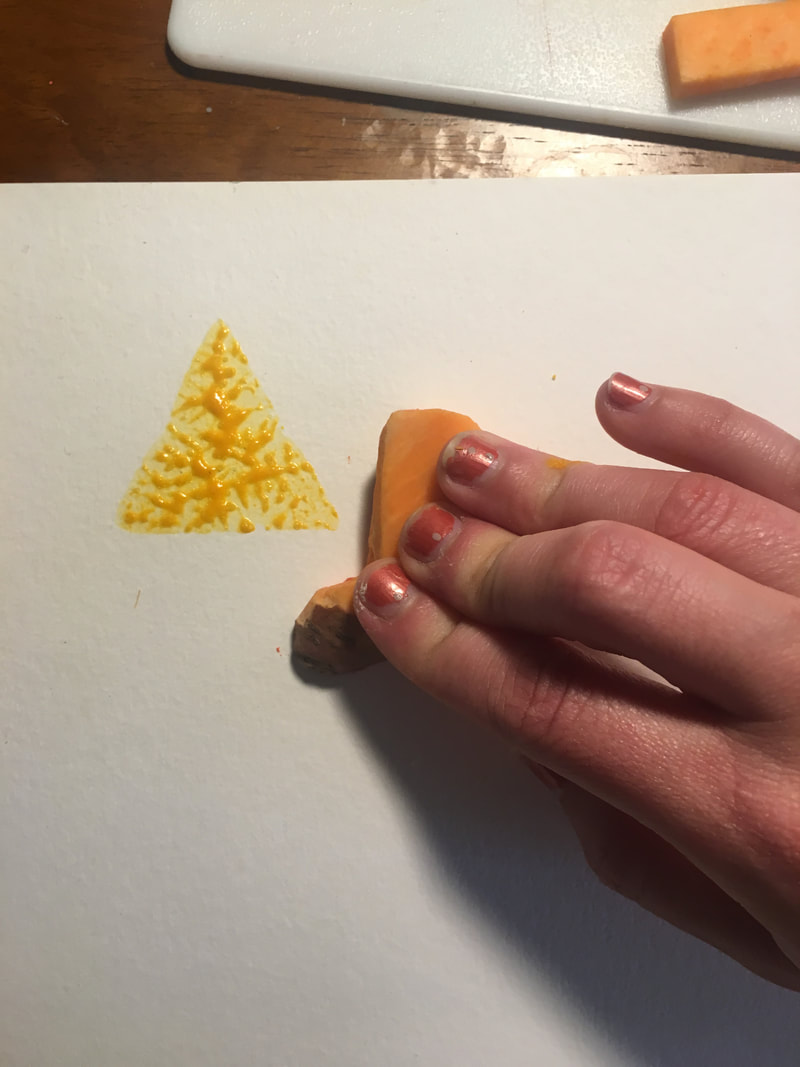
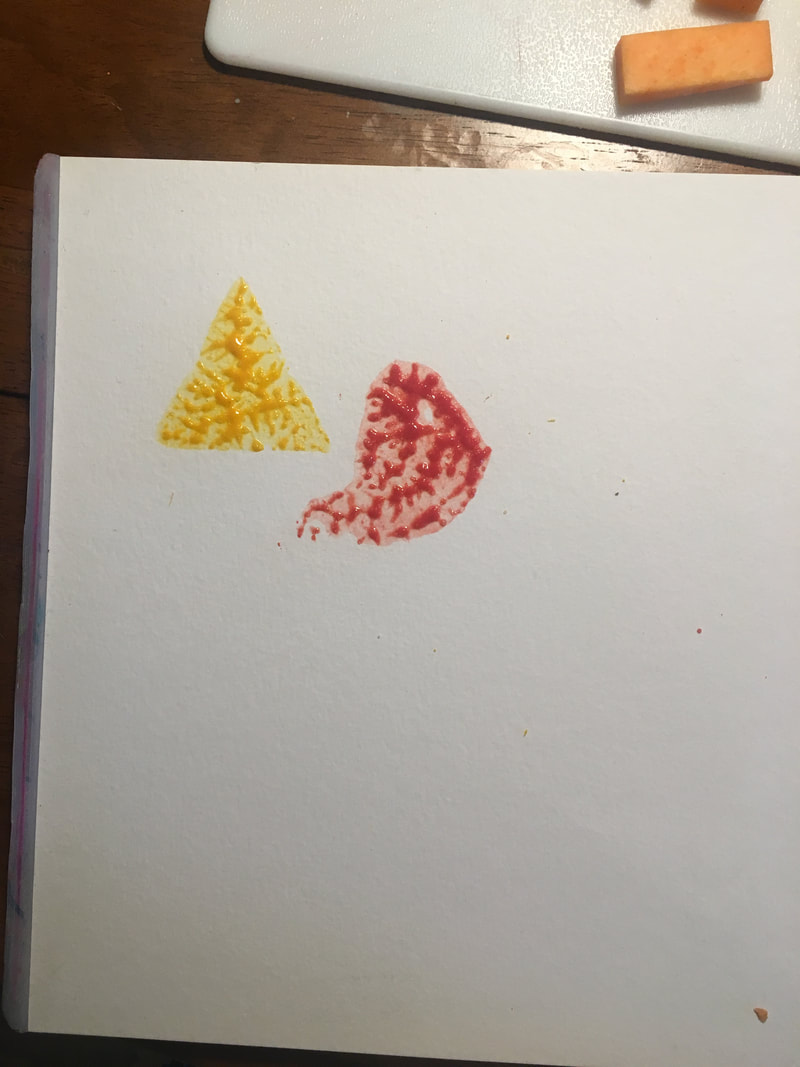
Homemade paint recipe and examplesNot all of us have access to paint at home. Here's a recipe to create your own paint from household items that you may already have in your cupboard. Homemade "acrylic paint" substitute: 1. Mix equal parts flour, salt, warm water. 2. Separate the mixture into 3 bowls. Use a few drops of food coloring in each bowl to create desired colors. I used Red, Blue and Yellow to create the PRIMARY colors. These colors can be mixed together to create any other color on the color wheel. 3. Use a paintbrush or a q-tip to apply the "paint" in a THIN and EVEN layer on your potato pieces, and press down onto paper. When you lift up, it should leave behind "paint" in the shape of your potato piece! Some photos of my process are listed below!
Send me pictures of your awesome potato prints! You can email or text me directly. [email protected] (757)512-4050 and most of all...HAVE FUN!!!!
0 Comments
I am SO excited about this art activity! Working with clay is one of my favorite mediums to introduce in the classroom, and has so many benefits for developing motor skills. Getting your hands on clay can be a really difficult thing to do without the proper studio, kiln, glaze, and tools; but with this recipe, you can create your own OVEN BAKE CLAY at home! Keep reading for the details: Oven Bake Clay Recipe 1 cup all purpose flower 1/2 cup salt 2 teaspoons of oil (any oil of your choice) 1 cup water Mix ingredients together in a bowl and knead with your hands until all materials are mixed. It should end up being similar to the consistency of pizza dough! The dough IS edible, but i will warn you---it doesn't taste great.
The dough is soft, but once it's cooked it becomes almost rock hard. Have fun and make whatever kind of shapes you want! Use some clay "tools" to help you sculpt with the clay; a butter knife, a fork and spoon are great tools to start with. They can help you cut, smooth, and create texture on your clay. Place your finished pieces on a baking sheet or cookie tray.
When you are finished creating your pieces, have a parent help you preheat your oven to 350 degrees, and bake for 45 minutes to an hour depending on thickness. My thickest piece was about 1/2 inch thick and 45 minutes was more than enough time! once you bake them, they will look like this and be rock hard: 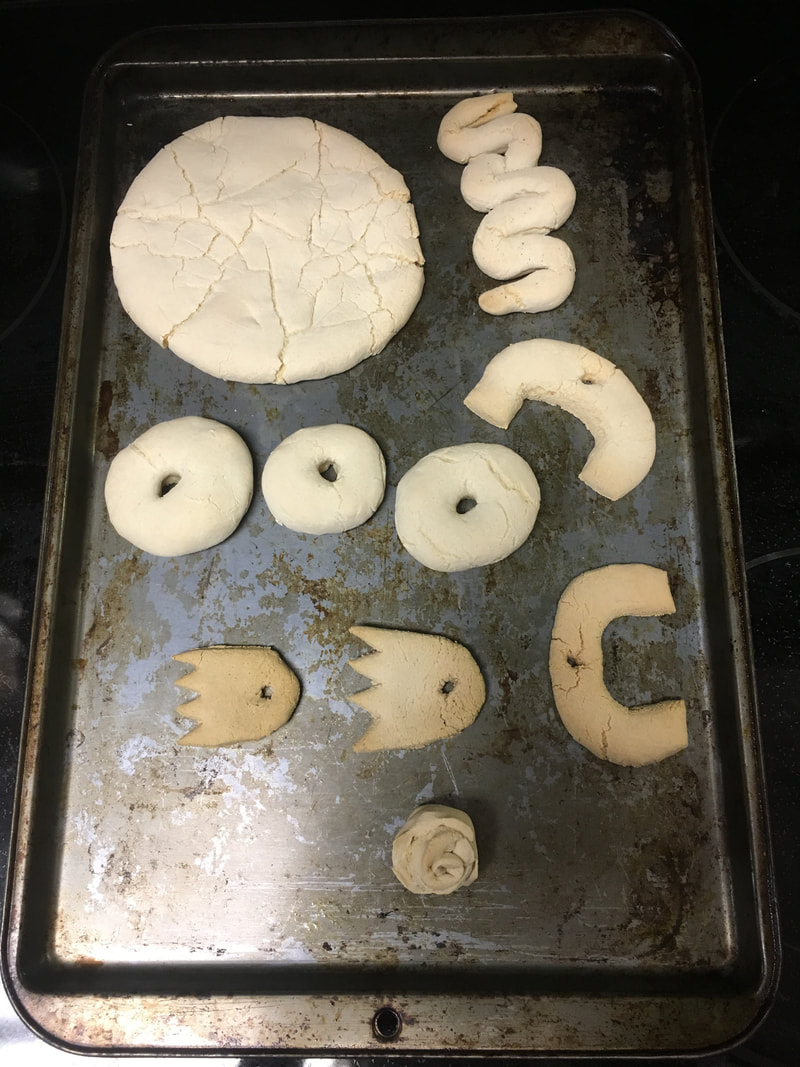 After your pieces are finished baking, you can paint them if you have acrylic paint at home. What else could you create? Some of the pieces I made will be turned into earrings or necklaces, but you could make anything you can think of!
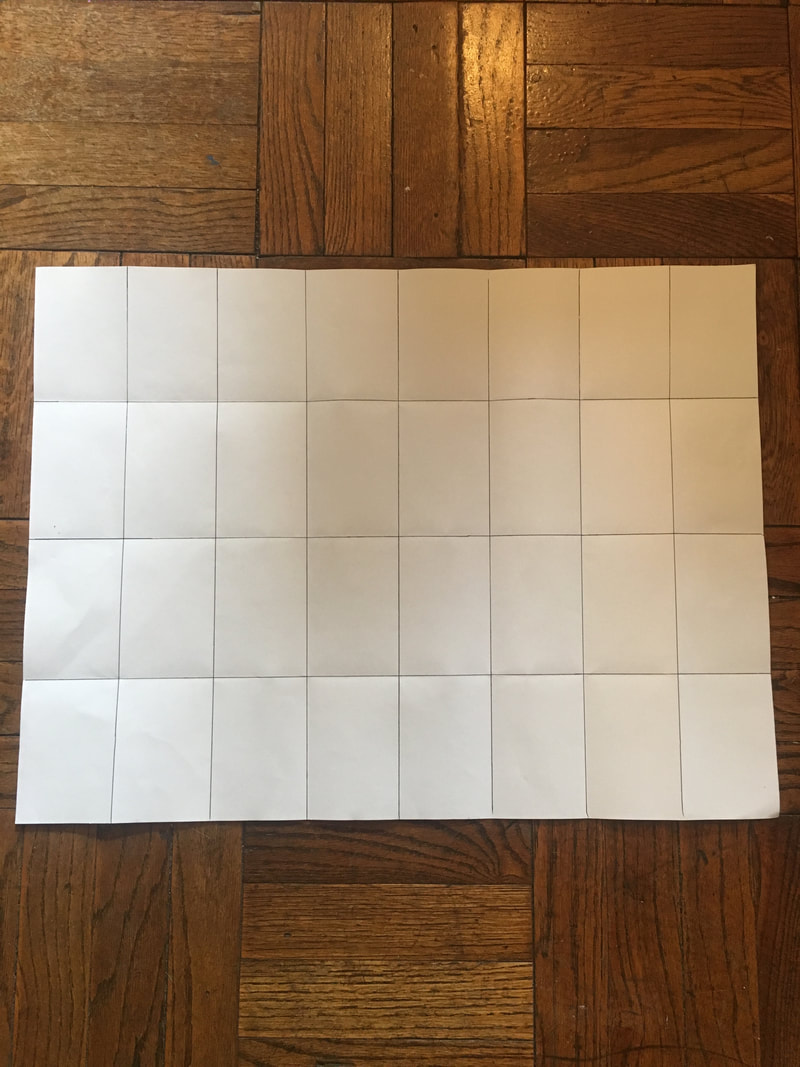
If you want to share photos of your clay creations with me, you can email or text! [email protected] (757)512-4050 And most of all...HAVE FUN!!! Hey everyone.....I have a question.... WHAT DAY IS IT?! I thought today was Monday, but apparently it is TUESDAY! Anyone else getting their days mixed up lately? I have a fun and STRANGE art and science experiment for everyone today. We will be using materials we can find around the house, and doing experiments to see how they react on a piece of paper. This is an easy way to make art when you don't have art materials at home! You can ALWAYS find ways of creating even when you don't have things like paint, crayons, or colored pencils. You might use your materials research to study how your materials work on paper and use them to create your own painting or drawing at home! Here's how to get started. Step 1: Set up your experiment. Find a piece of paper, and a pen or pencil. Use your pen or pencil to create sections on your paper. They do not have to be perfect! Make as many sections as you want, one section for each experiment. I folded my paper many times to help make my sections.
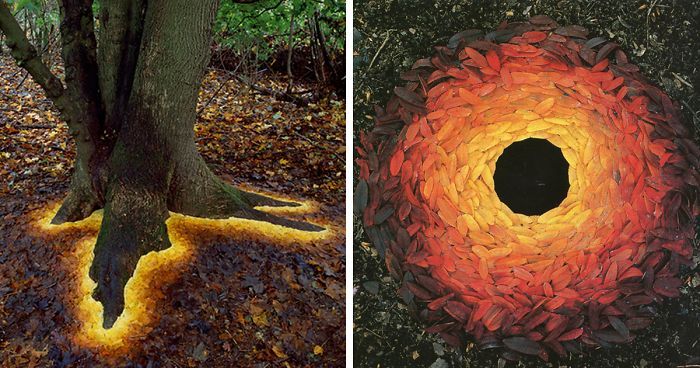
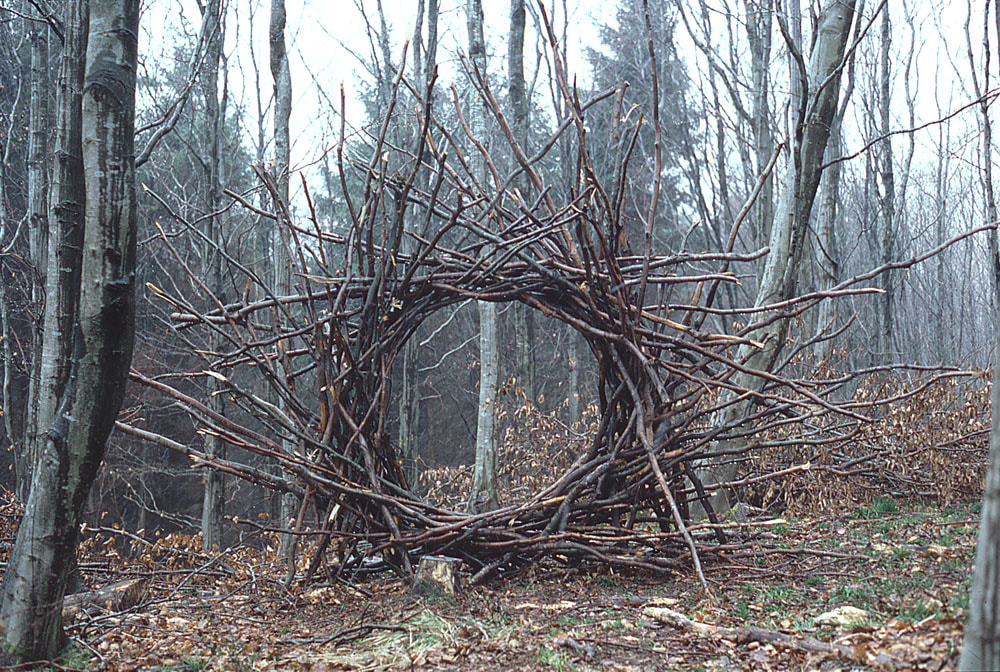
Step 2: Collect some "materials." You'll want to collect some materials from around the house. What kinds of things do you think would move like paint does? Try everything you can, but make sure it is ok with your parents first. Some things you might try--- Ketchup? Mustard? Spices mixed with water? Toothpaste? The options are endless! Use a paint brush, a q-tip, a cotton ball, or whatever you have lying around to make the marks on paper. Make sure when you try each material in a section, you write down what you used so you can remember later if you want to use that material to paint with. 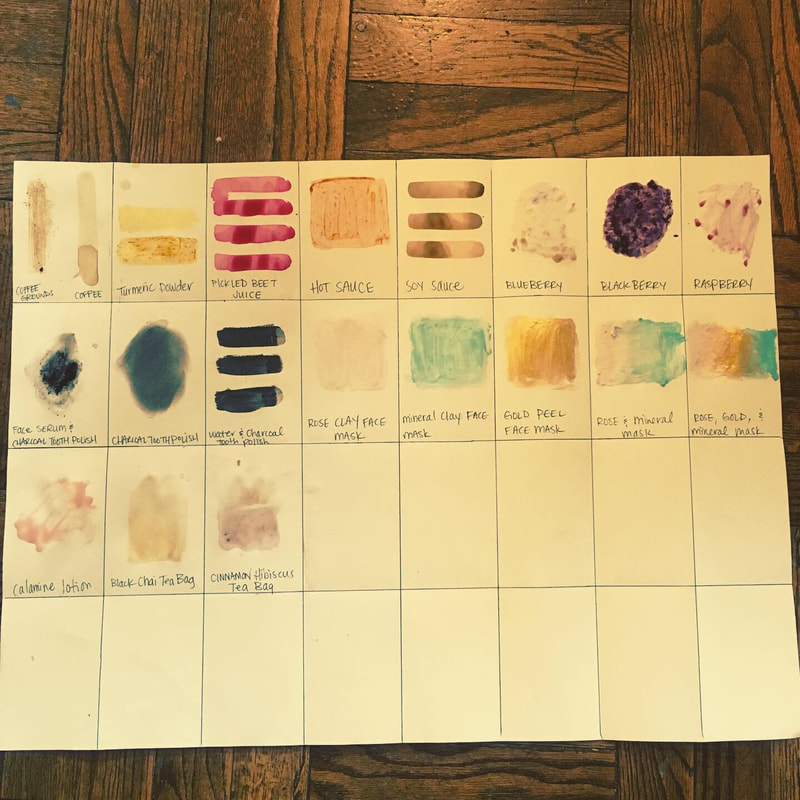 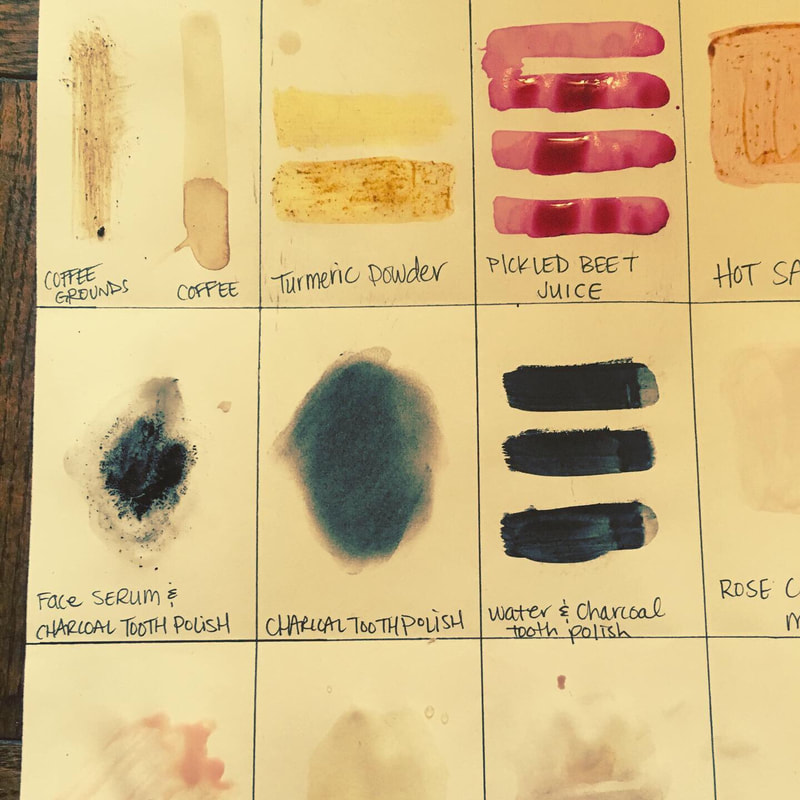 Step 3: Wait! Let your materials dry! Once they are dry, you will see what they will look like if they are used in a painting. Make some OBSERVATIONS about your EXPERIMENTS; Which ones turned out well? Not so well? Do you like the way some of them look? What colors did you end up with? Once you've made your observations, you should have a few materials that you really like. Why not make a painting with them??? For my painting, I really liked the way the soy sauce and the beet juice both looked when they were dry. They kind of acted like watercolor paint! And I loved the color I got by using blackberries. So I used all 3 materials in my abstract painting. 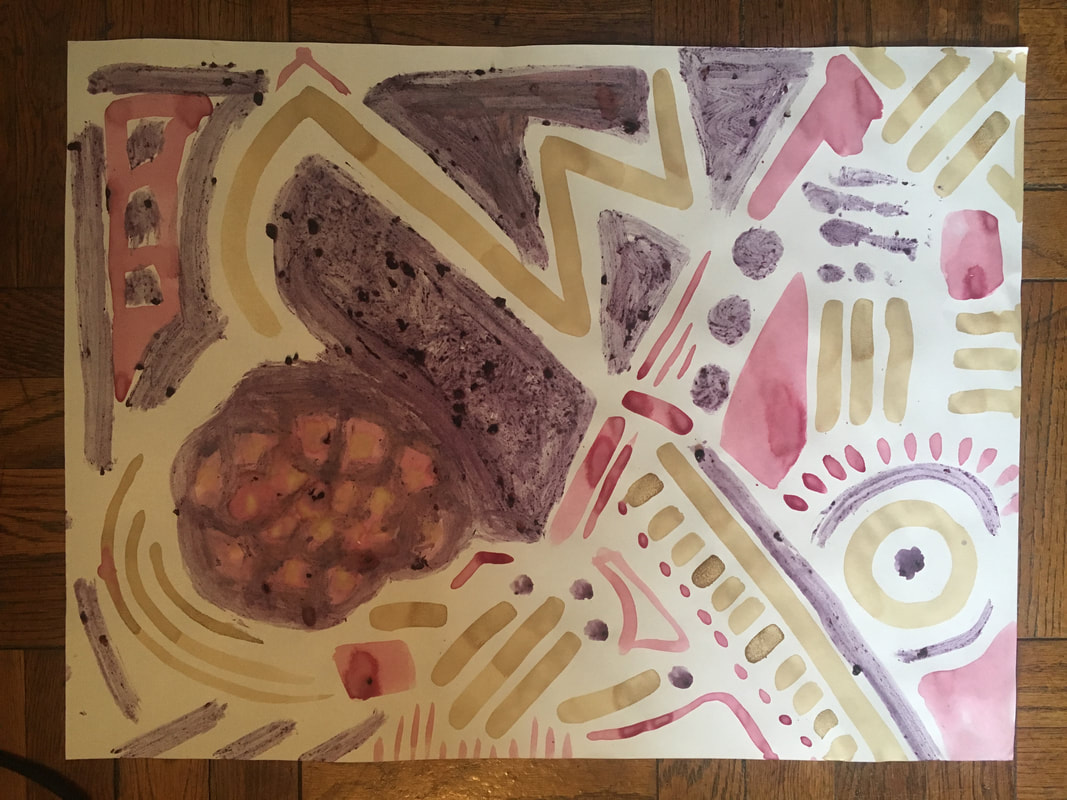 Now it's your turn to become an arts scientist and create your own experiments and paintings. Share your photos with me if you'd like to! [email protected] (757)512-4050 And most importantly... HAVE FUN!!! Unfortunately, today is a rainy day! You can save this art activity for one of the nicer days this week, or use it as an opportunity to play in the rain! But remember, always ask your parents or caretaker first. Alternatively, I have posted another inside art activity below this post if you want to scroll down and check it out instead; you can do either, or both!!! Remember, these art activities are not mandatory; they are just for fun if you want to keep making art while we are away from school! For this art activity, I wanted to share the artwork of famous artist Andy Goldsworthy. He uses materials like sticks, leaves, rocks, sand to create temporary sculptures that are meant to fade away and be forgotten. Here's some examples of his sculptures!
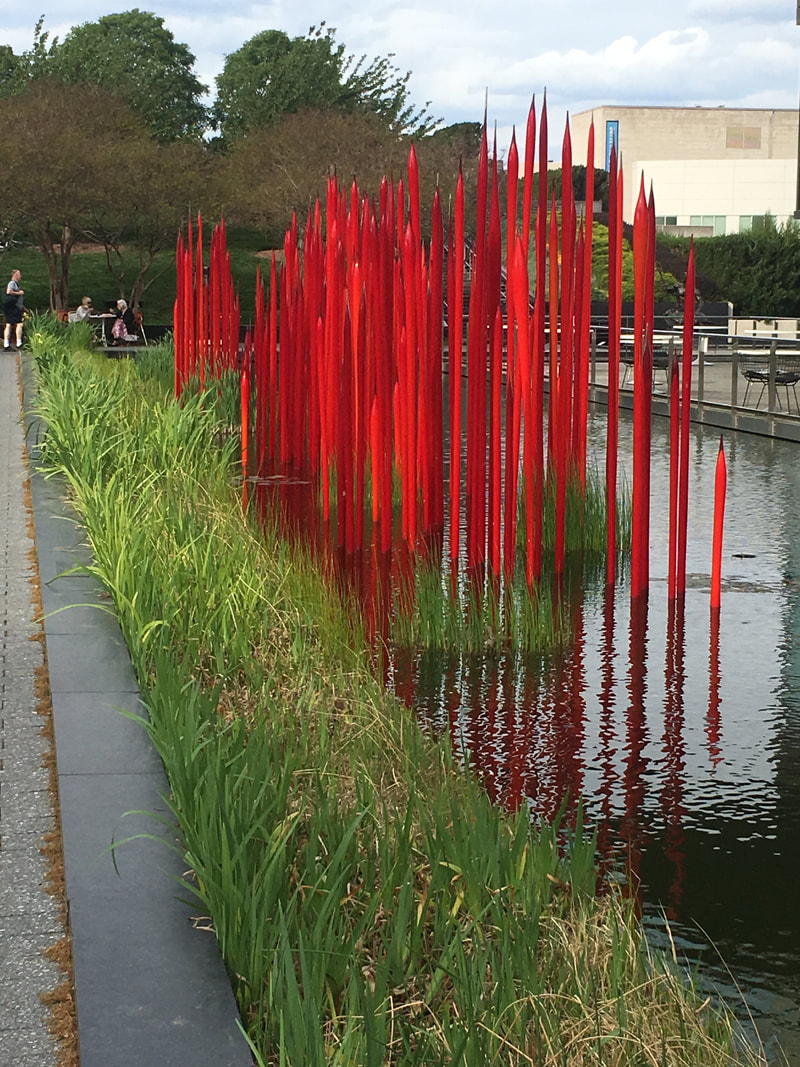
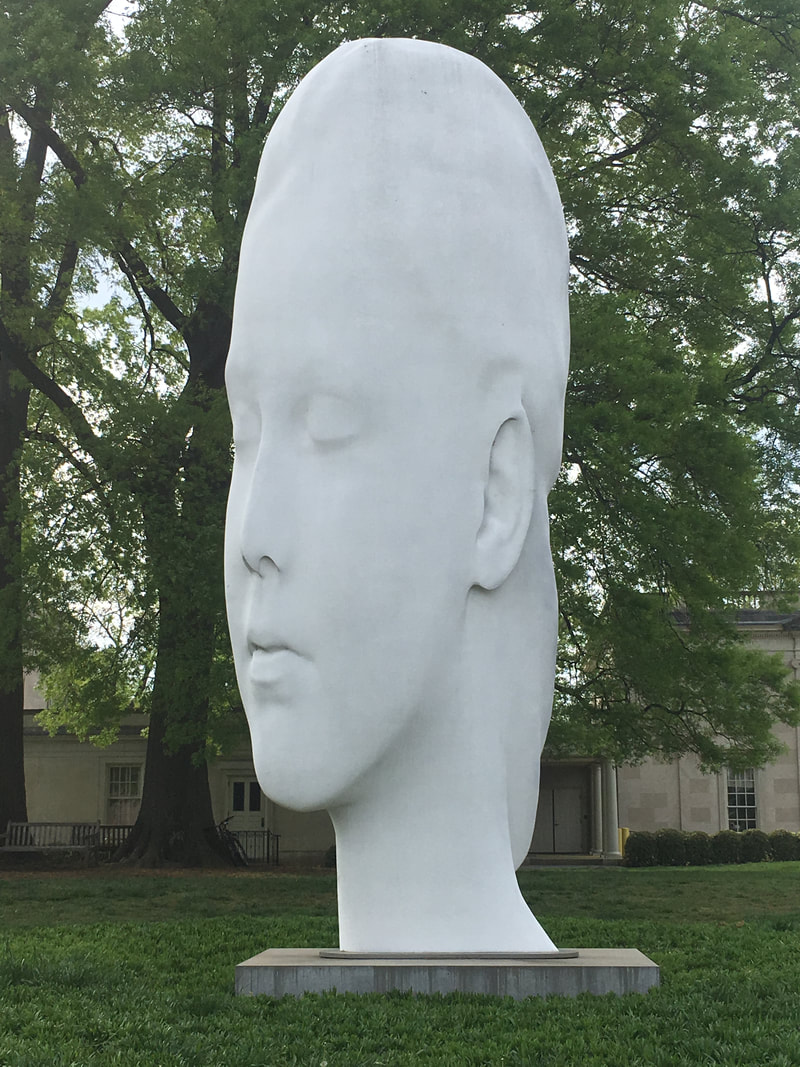
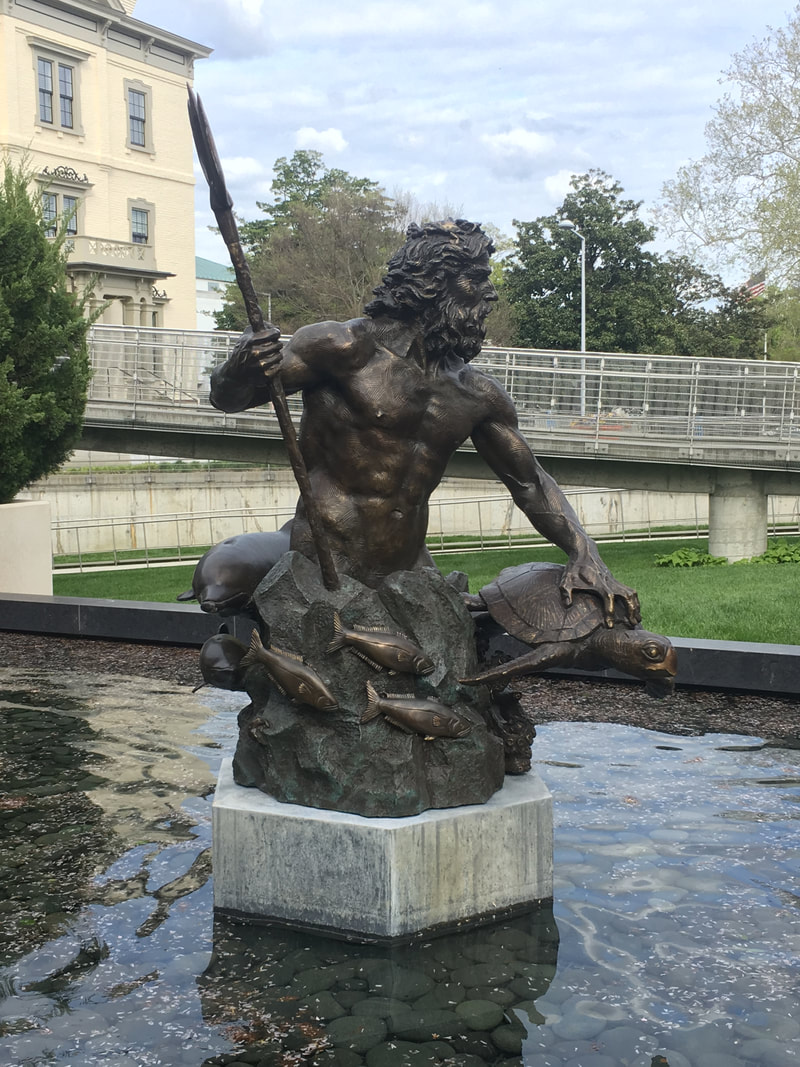
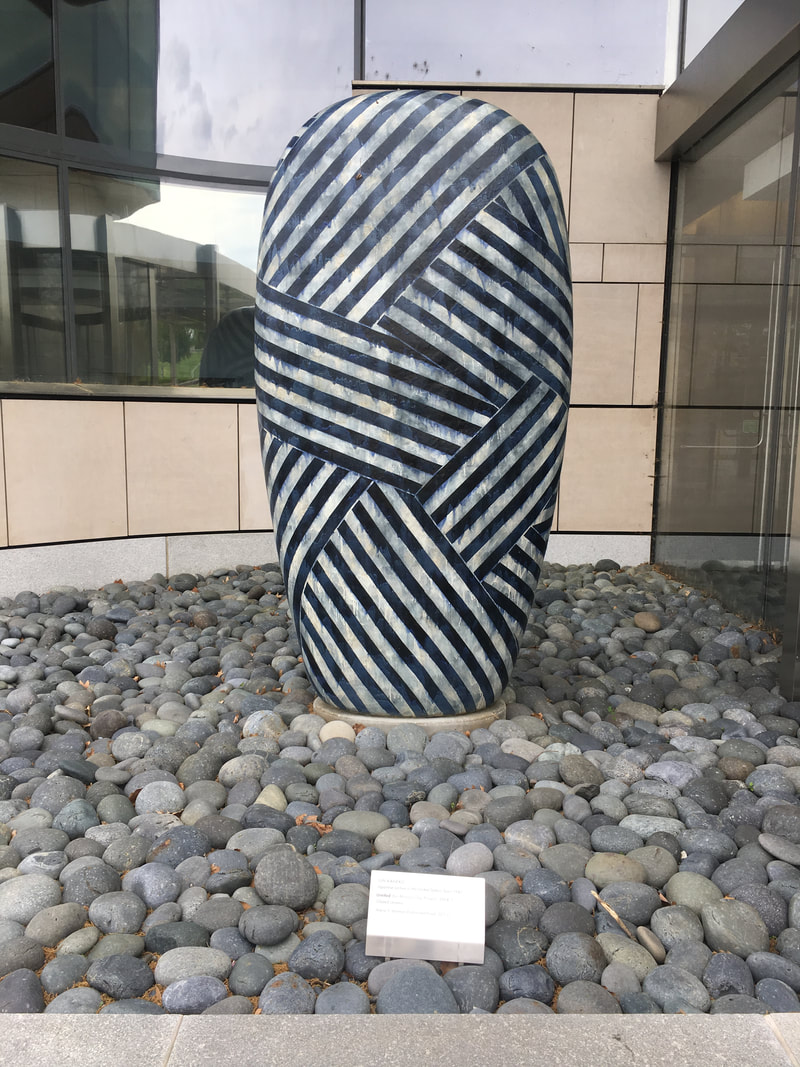
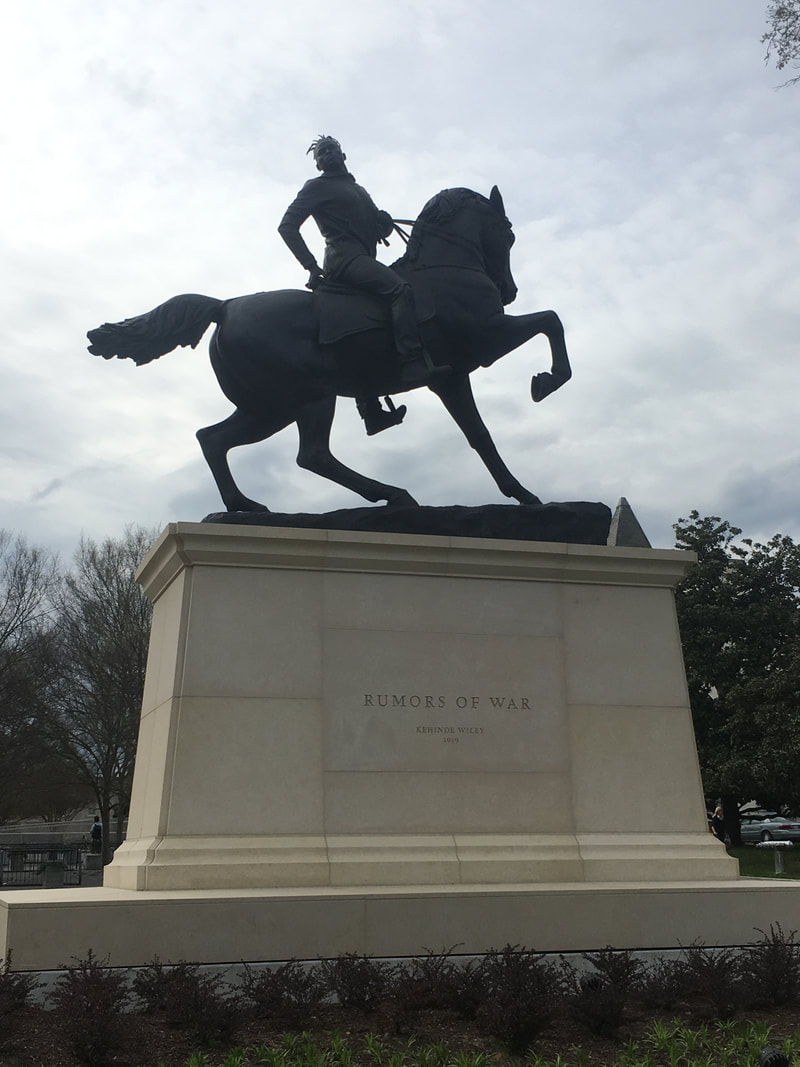
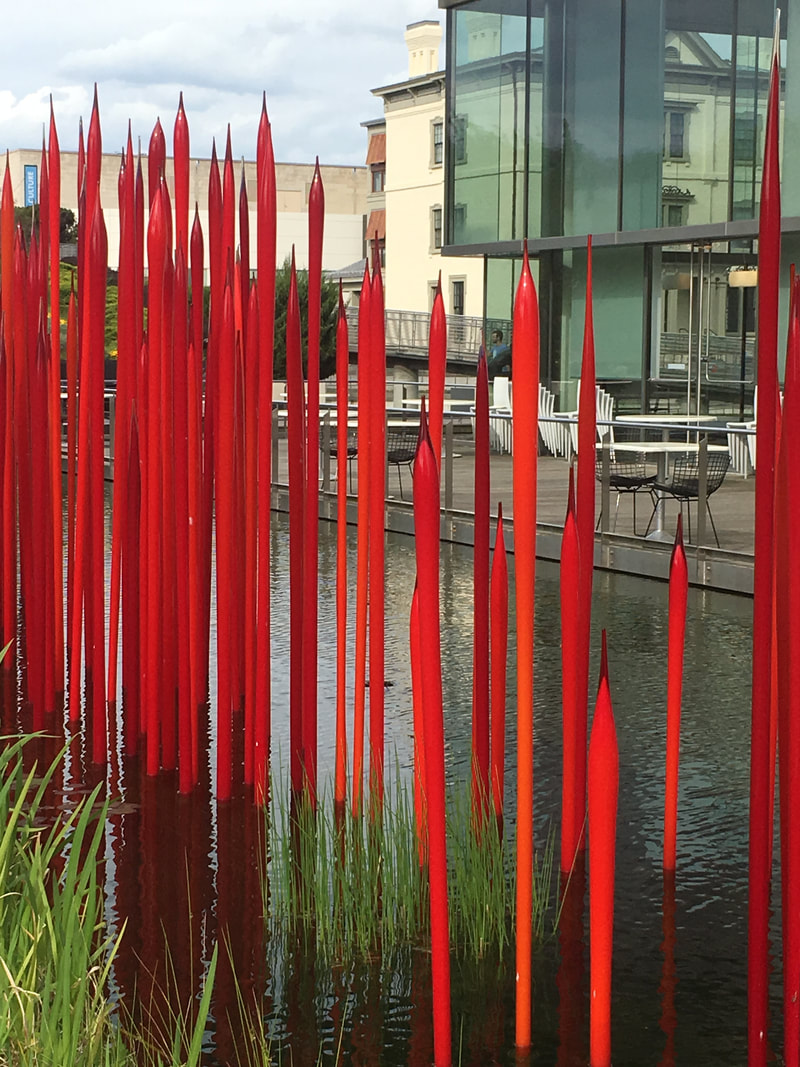
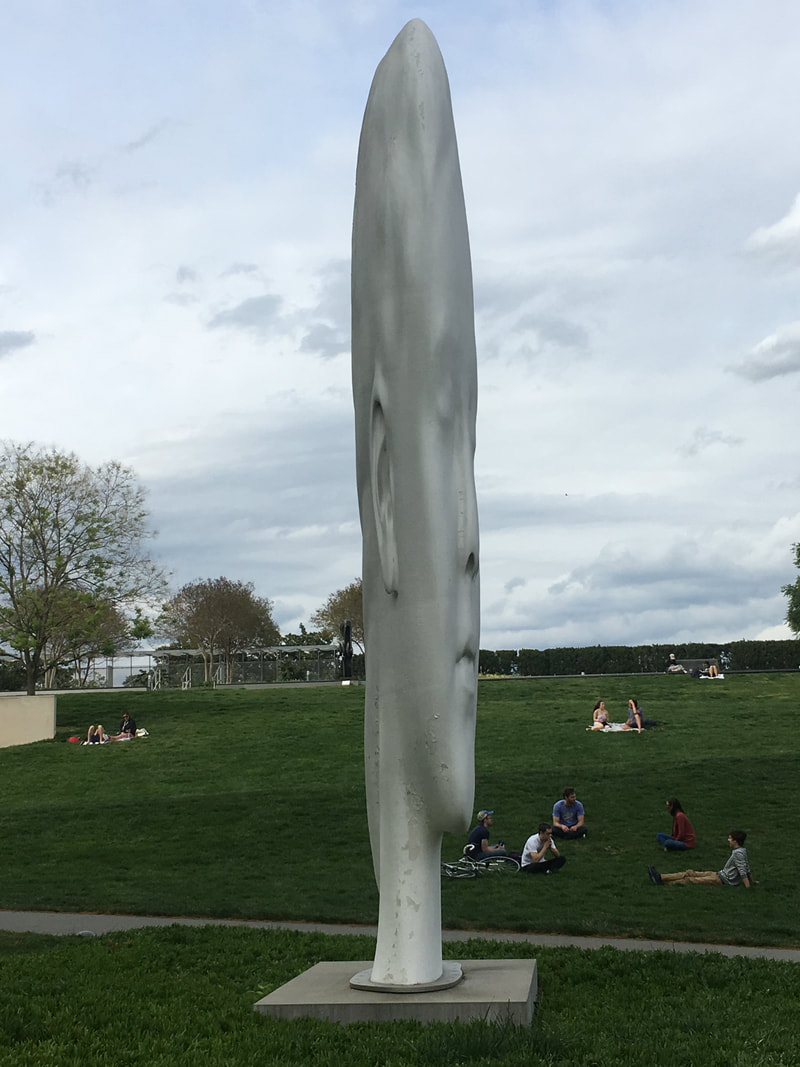
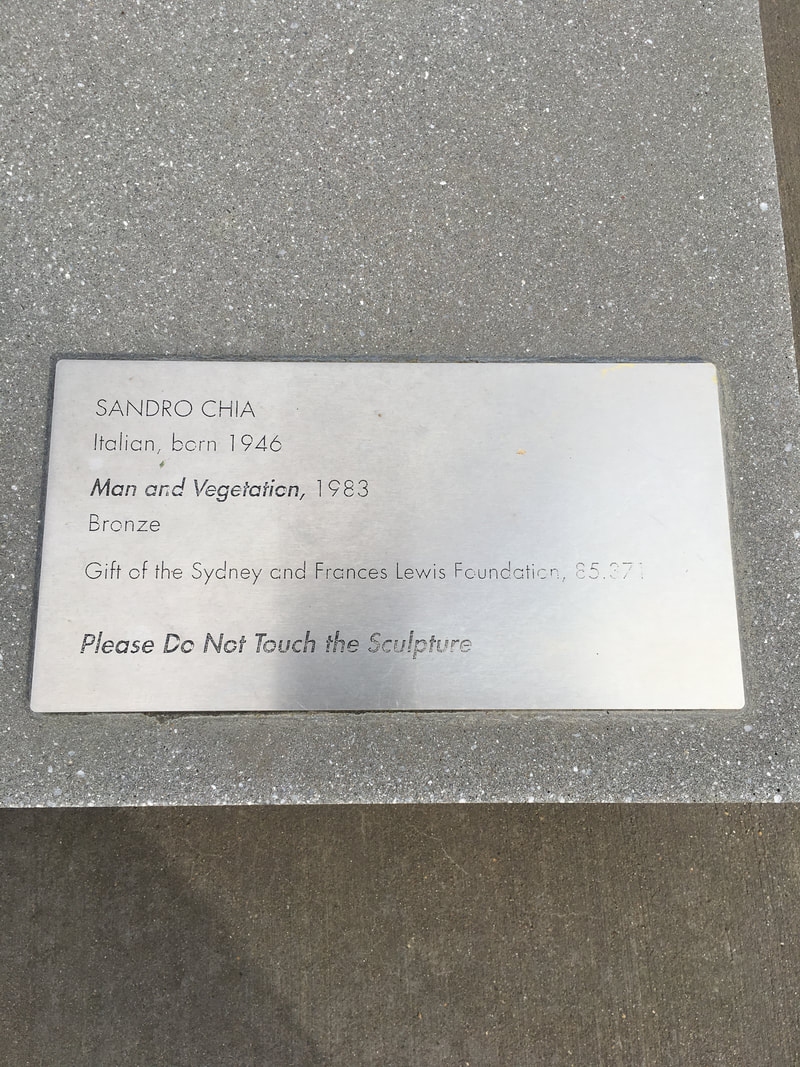
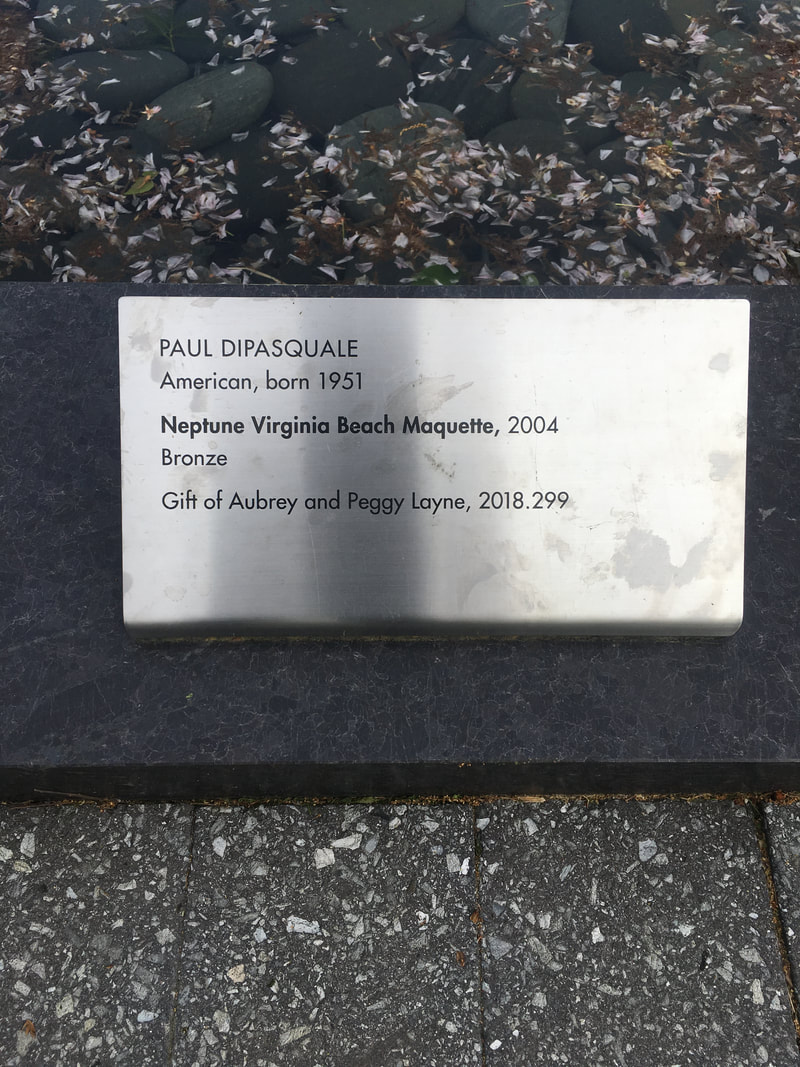
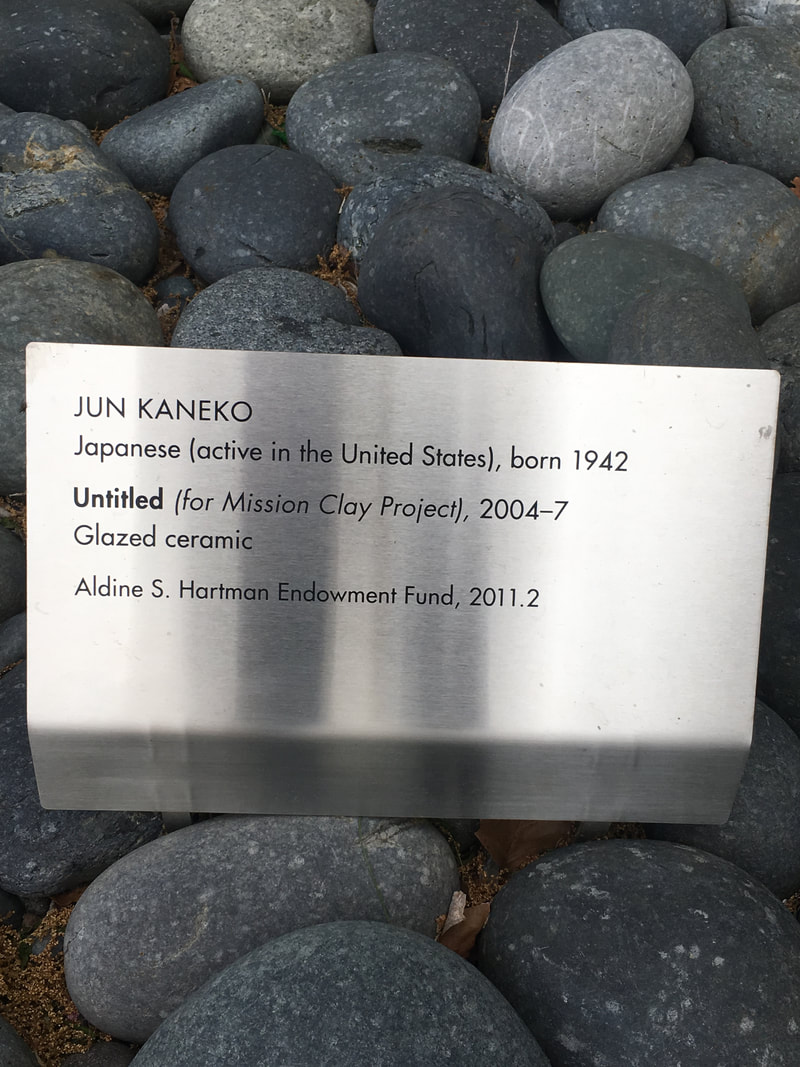
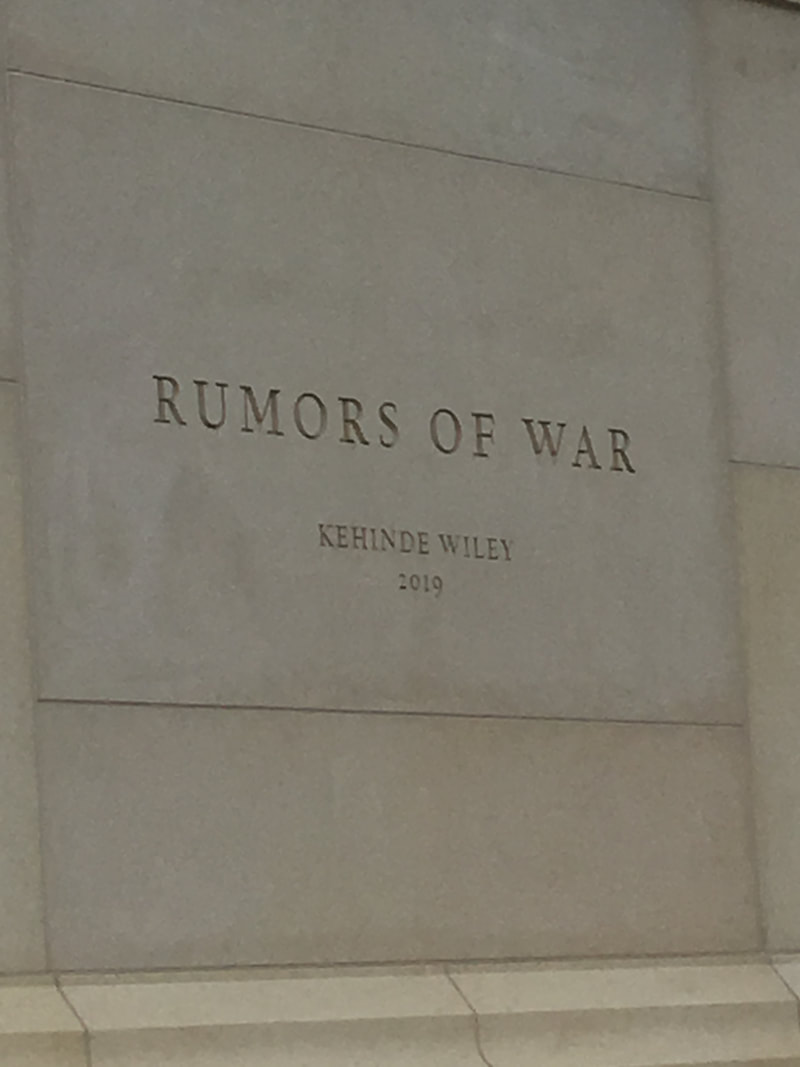
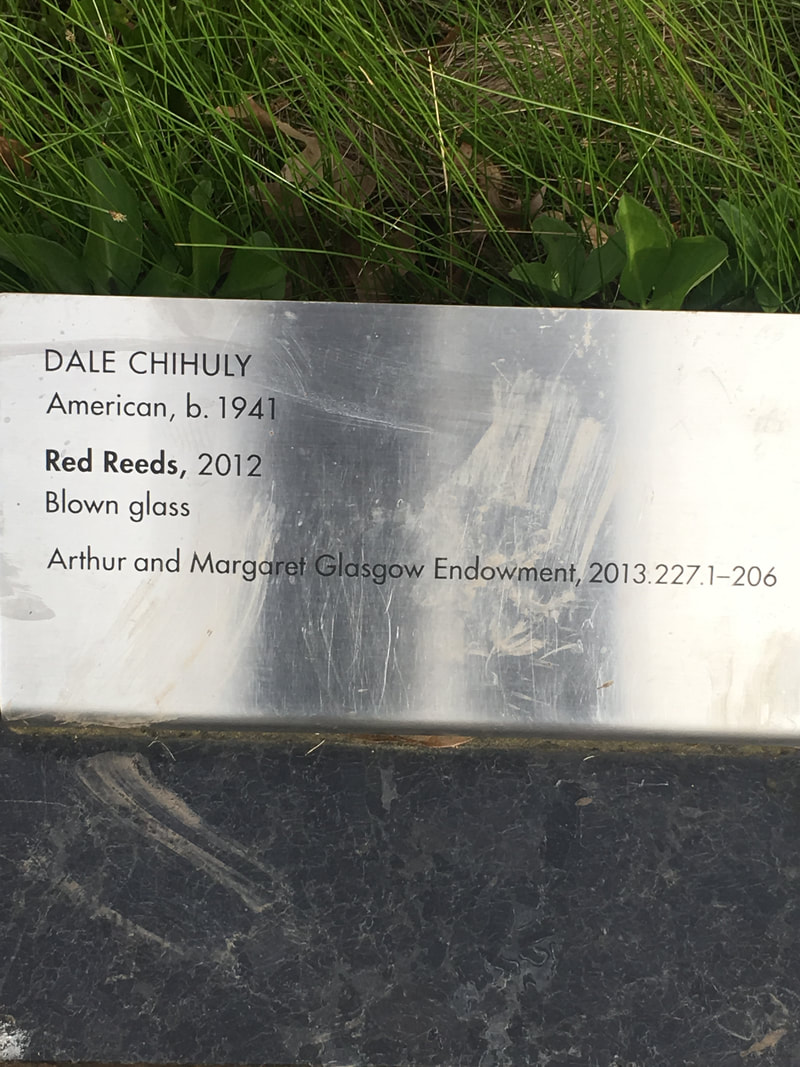
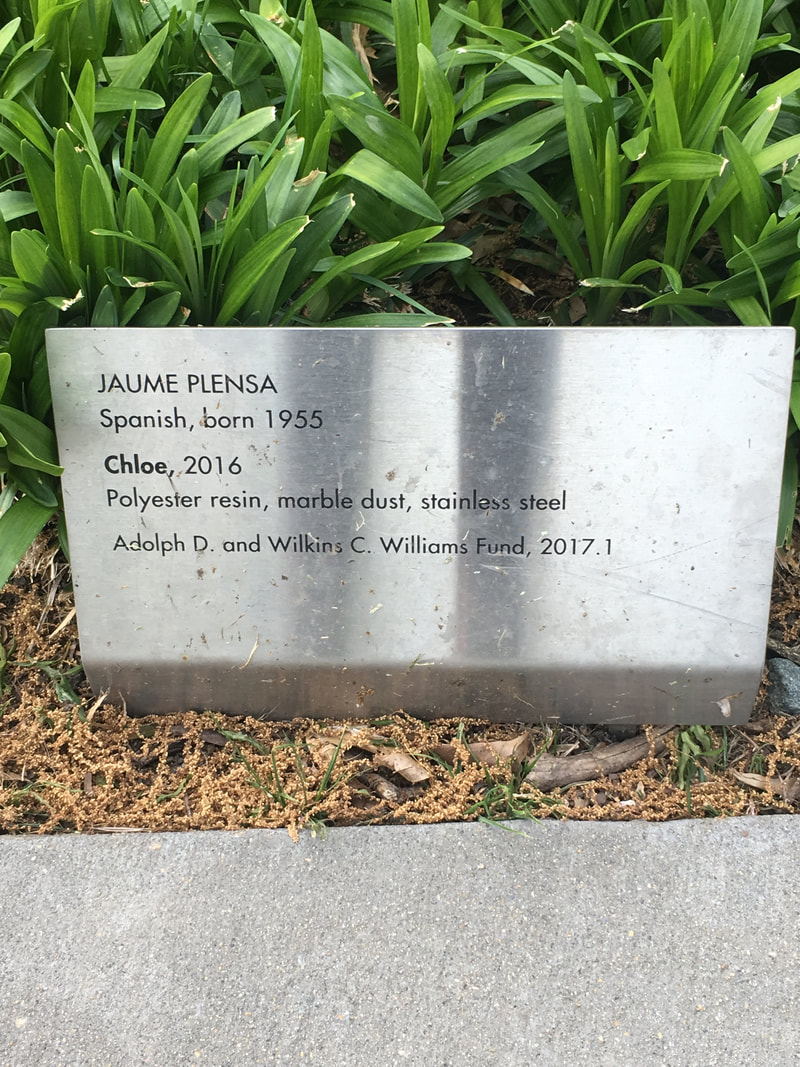
 Interesting, right?! Sometimes, all that remains of his work are the photos that are taken. The leaves may blow away and be lost forever! What do you think Andy Goldsworthy is trying to say by making art doesn't last the test of time? His artwork may make us think about ideas like the circle of life, environmentalism, the food chain, etc! I'd love to see all of you fabulous artists create your own outdoor art pieces! What can you find in your yard or neighborhood to create a beautiful piece of art? Think about shapes you can make, colors you can use, lines, etc. Here's an example of one I created using some leaves I picked up on a neighborhood walk, and some rose petals from a bush nearby! 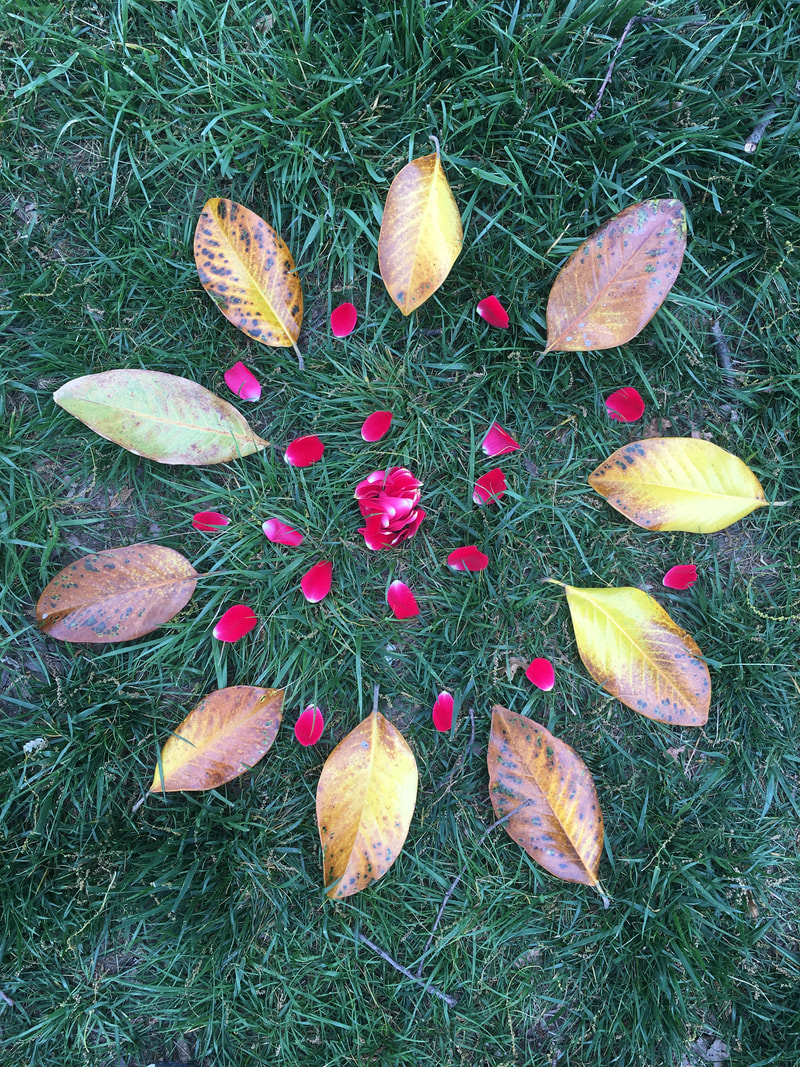 If you want to, share a photo of your art with me! You can text or email it to me. (757)512-4050 [email protected] and most importantly... HAVE FUN!!!! A Trip to the vmfa sculpture garden through photosThis week, I took many walks around the VMFA sculpture garden, as it is near where I live. I wanted to share some images of some of the sculptures with you guys! Hopefully one day, some of us may be able to take a field trip to the Virginia Museum of Fine Arts and see these sculptures face to face! One of the sculptures is a recent addition by an artist we learned about last week, Kehinde Wiley! Can you guess which one it is?
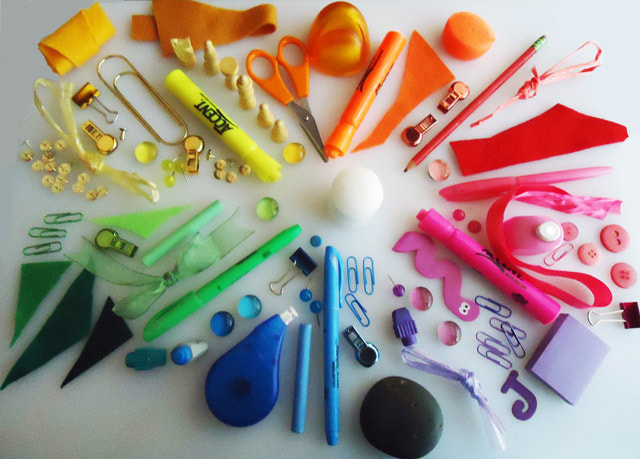
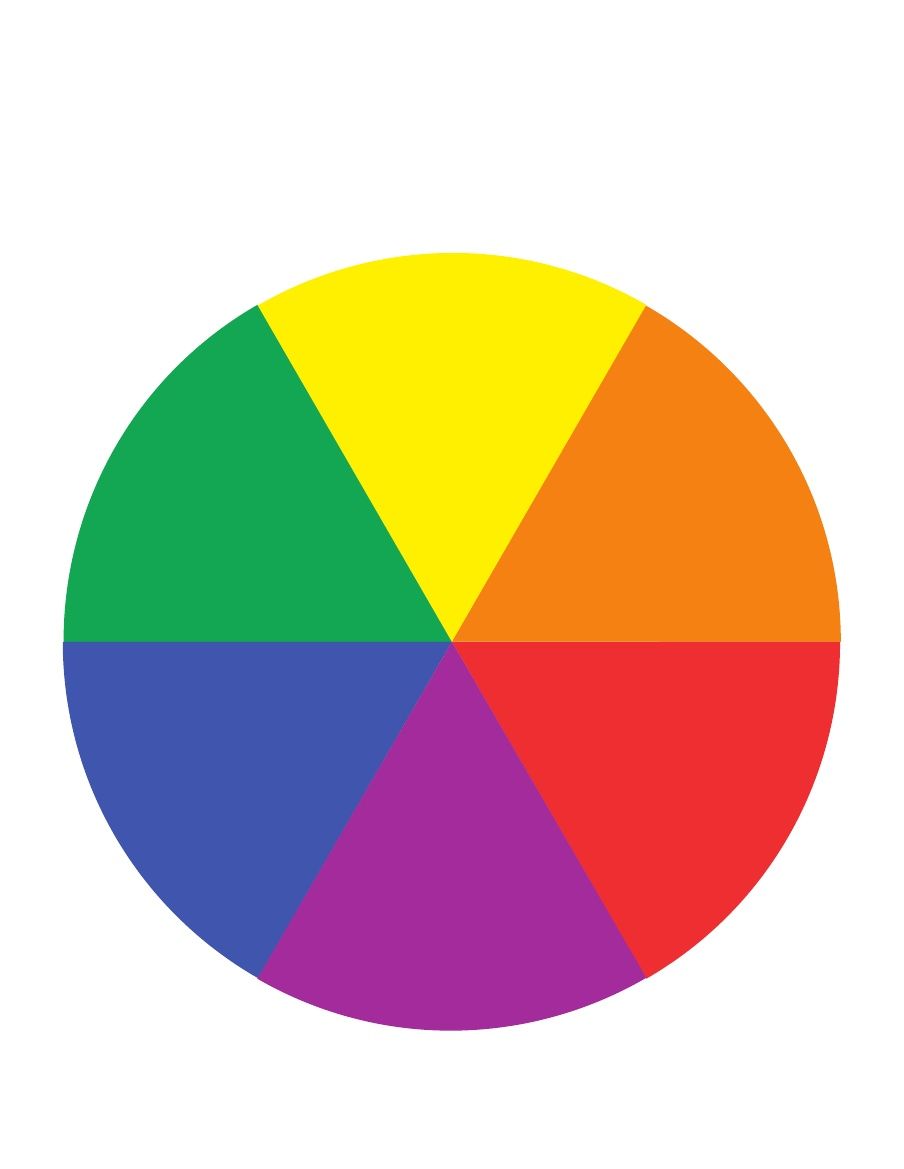
Hi Everyone!!! How are you guys all holding up out there? I hope everyone is safe and feeling 100%! If you're not feeling 100%, that's ok. We are all going through a strange time! Remember, these art activities are not mandatory; they are just for fun if you want to keep making art while we are away from school! Here's a simple art activity that's sure to give you a review on COLOR! The goal of this activity is to use FOUND OBJECTS; But what is Found Object Art??? Found object art is any sculptural or 3-D piece of art that uses items that you find around your home or community. This activity will challenge you to create a color wheel using objects you can find around the house! But first, here's a video to remind you of the 6 colors we will be focusing on. The PRIMARY colors (red, yellow, and blue) and the SECONDARY colors that are created when you mix the primary colors (green, purple, and orange). Watch this short video if you want a fun song and a catchy guide to remembering the difference! Here's an example of what to do! Collect objects in these 6 colors from around your house and arrange them in the same way as the color wheel!
Feel free to share a photo of your found object color wheel with me via text or email!
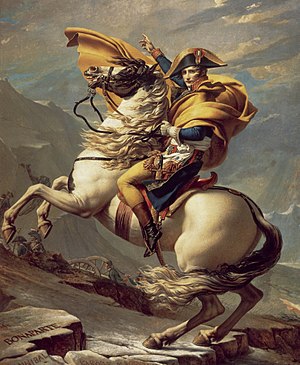
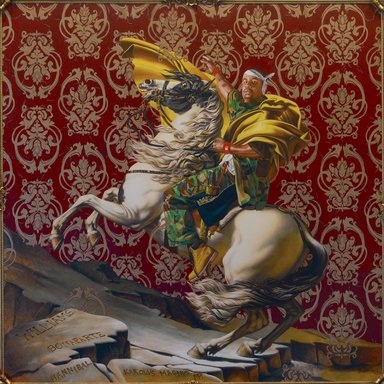
(757)512-4050 [email protected] And most importantly... HAVE FUN!!! Welcome to the FIRST at home art activity! I am REALLY excited about this one! This year, some of my students have learned about an artist named Kehinde Wiley. Kehinde's paintings focus on taking old historical portraits and replacing the subject of the painting with a random person off of the street. His paintings deal with ideas of power play, representation, race and identity. Below I have posted a side-by-side comparison of one of his paintings and the painting it was inspired by. What differences do you notice? What similarities? What do you think Kehinde Wiley is trying to say by replacing the old subject with a new one? The room for exploration between these two paintings is endless!
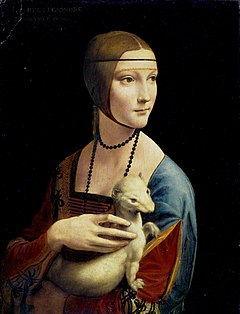
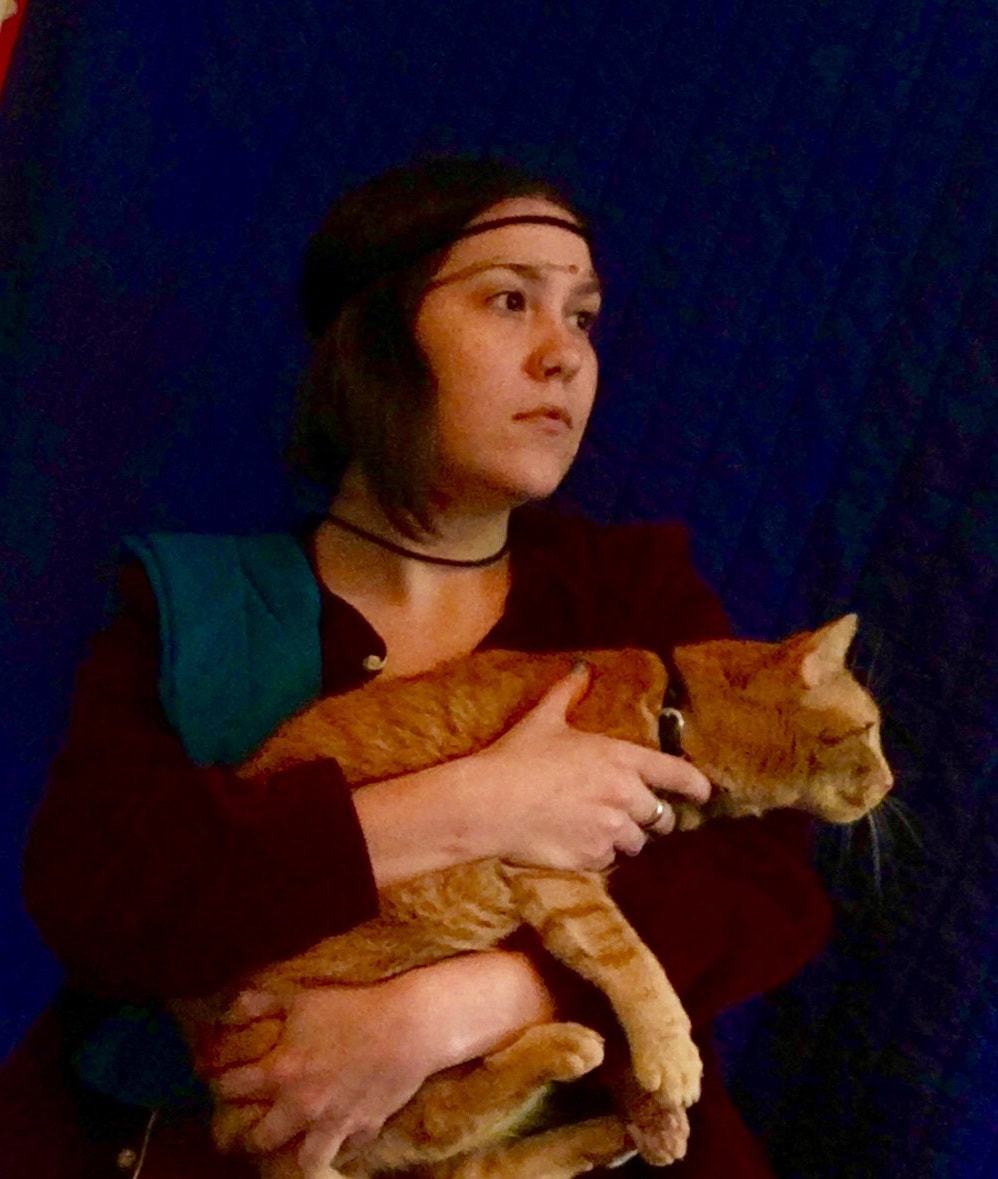
So, can you guess what the art activity is yet?!?!?!? This week, I want you to do some searching and find a famous portrait that you want to recreate! This website has a bunch if you have trouble finding one. We are going to be inserting ourselves into the painting just like Kehinde Wiley does with his subjects! Study your portrait choice and look for specific things you'll need to recreate-- what does the background look like? The clothing or costume? Is this person wearing jewlery? What is their facial expression? Find out as much as you can from looking at the portrait first. Then, search your home for materials that you can use to dress yourself up as the person in the portrait! Once you've found all of your materials, get dressed, get set up, and either take a selfie or have someone photograph you! Congratulations, you have just become a famous painting!!! Here's an example that I did myself !
If you want to, share your photos with me! Send me an email or a text that includes your name, the painting you chose to recreate, and the photo you took! You can also contact me if you have any questions.
[email protected] (757)512-4050 Most importantly...Have Fun!!!! |